Clip and Resample the DEM
The DEM should be clipped to the Data Collection Mask extent and resampled to the planned MIKE SHE grid resolution. This ensures consistent raster alignment throughout the model setup process.
-
Open the Processing Toolbox by selecting Processing → Toolbox.
-
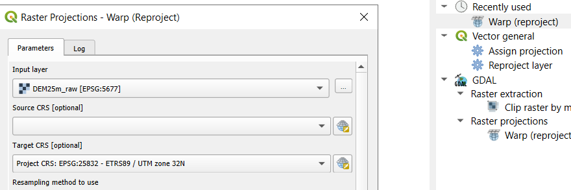
Search for and open the Warp (Reproject) tool.
-
Select the DEM as the Input layer.
-
Set the Target CRS to the project coordinate reference system.
-
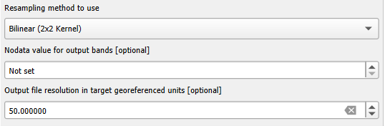
Set the Resampling method to:
-
Bilinear for continuous elevation data.
-
Specify the desired output resolution:
-
Output file resolution in target georeferenced units = desired MIKE SHE grid size (e.g. 50 m, 100 m, or 200 m).
-
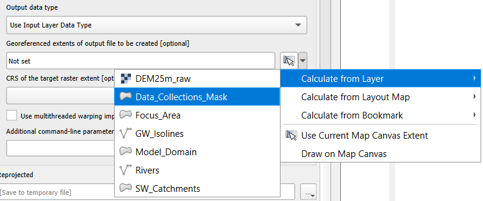
Under Advanced Parameters, set:
-
Georeferenced extent of output file to be created = Calculate from Layer → Data_Collection_Mask
-
Specify an output file location under Reprojected.
-
Specify the extension as
.asc
-
Click Run.
-
Load the resulting raster and verify:
-
The raster uses the project CRS.
- The raster extent matches the Data Collection Mask.
-
The raster cell size matches the planned MIKE SHE grid resolution.
-
Save the project.
Note
Using the Warp (Reproject) tool allows clipping, reprojection, and resampling in a single operation. This helps ensure that all subsequent raster layers are aligned to the same processing extent and grid resolution.
Convert ESRI ASCII Grid to DFS2 Using Grid2Mike
The prepared DEM can be converted from ESRI ASCII Grid (*.asc) format to MIKE DFS2 format using the MIKE Zero Toolbox.
-
Open MIKE Zero.
-
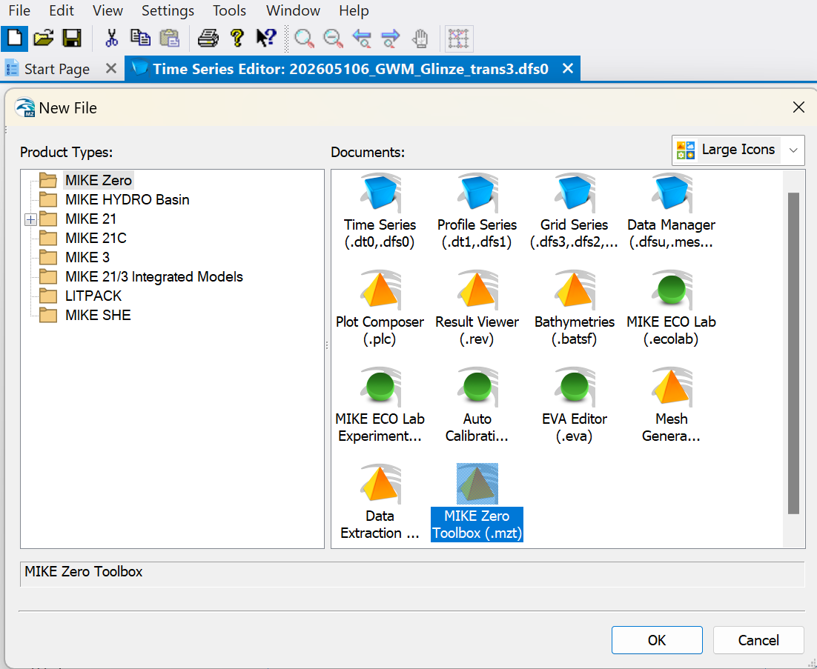
Select New from the top menu.
-
Open the MIKE Zero Toolbox.
- Navigate to:
GIS → Grid2Mike
-
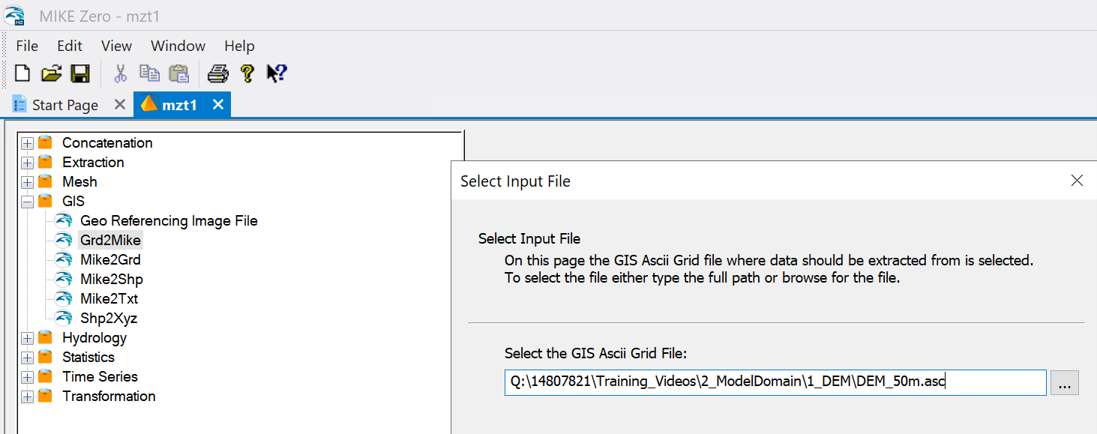
On the Input File page:
-
Select the prepared DEM ASCII file.
- Ensure that the ASCII file is not open or being used by any other application.
- If the file is currently loaded in QGIS, remove the raster layer from the project before running Grid2Mike, as QGIS may lock the file and prevent Grid2Mike from accessing it.
-
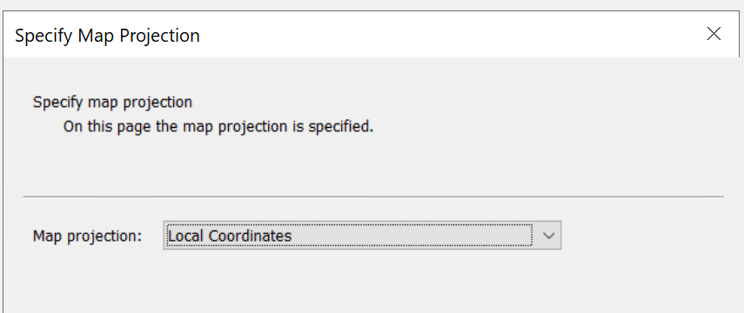
On the Specify Map Projection page:
-
Select the map projection corresponding to the coordinate reference system that will be used in the MIKE SHE model.
- It is recommended to prepare all input datasets in a common, official coordinate reference system.
- However, when importing the data into MIKE SHE, the projection type should typically be specified as Local Coordinates.
-
Verify that the selected projection matches the projection used in QGIS and in the MIKE SHE model setup.
-
On the Specify Output File page:
Specify the output file name and location.
Specify the DFS item properties:
- Item Name: Topography (optional)
- Item Type: Elevation
- Item Unit: meter
-
Land Value is not important for MIKE SHE applications.
-
On the Status page, click Execute to create the DFS2 file.
-
Open the generated DFS2 file in the Grid Editor and verify:
-
The spatial extent.
- The cell size.
- The coordinate system.
- The elevation values.
Note
The tool reads the grid geometry directly from the ESRI ASCII header and therefore preserves the raster extent and resolution defined during the QGIS preprocessing steps.
Important
Some MIKE SHE modules require specific DFS item types. For topography files, the item type must be set to Elevation. If the item type is incorrect, MIKE SHE may reject the file with a "No valid items" error message.
Click here to jump to the next section: